The Lights escutcheon is held in place by the chrome hollow nut behind the toggle switch.
To remove the Lights escutcheon you have to remove the whole switch from the dash.
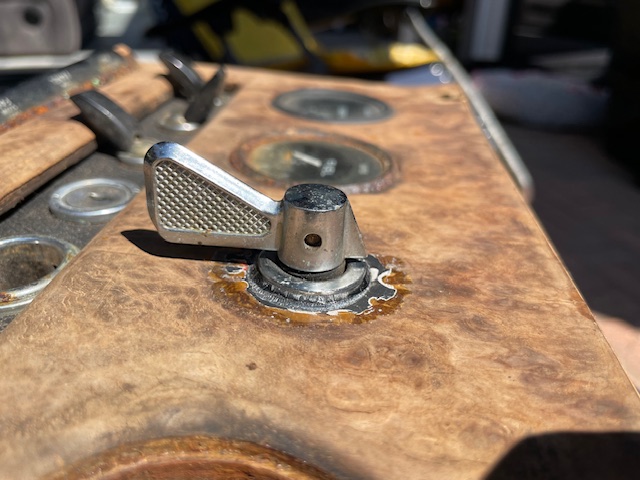
First remove the toggle switch which is held in place by a spring clip/ There is a hole in the side of the toggle switch which you push (I used a small allen key) and the toggle switch pulls off the spindle.
Next go to the back of the switch and disconnect all the electrics which are held in place with small flat head screws. Take a photo of the back of the switch as this will help when putting all the electrics back in place. You can leave the wires attached but it does not give you a lot of room to move the switch out of the way for the next part.
The switch is held in place with three 5/16 nuts which also hole some earths to the switch. Remove the 5/16 nuts and the switch can be lifted out of the way.
Underneath the switch there is a large thin nut that holds the hollow chrome nut to the dash. Remove the nut ( used a pair of pliers to turn it off) and the chrome hollow nut can be removed from the front of the dash board along with the Lights escutcheon.
Assembly is the reverse with the wires all attached as per your photo that you took.
Photos below are of my old dash light switch being taken apart which had a broken Lights escutcheon but a small ring of it is still there held in place by the hollow chrome nut.
- IMG_2390.jpg (120.61 KiB) Viewed 224 times

- IMG_2391.jpg (107.55 KiB) Viewed 224 times

- IMG_2393.jpg (133.16 KiB) Viewed 224 times

- IMG_2392.jpg (106.81 KiB) Viewed 224 times

- IMG_2396.jpg (142.13 KiB) Viewed 224 times

- IMG_2395.jpg (176.56 KiB) Viewed 224 times

- IMG_2398.jpg (95.11 KiB) Viewed 224 times

- IMG_2397.jpg (149.75 KiB) Viewed 224 times
The Lights escutcheon is held in place by the chrome hollow nut behind the toggle switch.
To remove the Lights escutcheon you have to remove the whole switch from the dash.
First remove the toggle switch which is held in place by a spring clip/ There is a hole in the side of the toggle switch which you push (I used a small allen key) and the toggle switch pulls off the spindle.
Next go to the back of the switch and disconnect all the electrics which are held in place with small flat head screws. Take a photo of the back of the switch as this will help when putting all the electrics back in place. You can leave the wires attached but it does not give you a lot of room to move the switch out of the way for the next part.
The switch is held in place with three 5/16 nuts which also hole some earths to the switch. Remove the 5/16 nuts and the switch can be lifted out of the way.
Underneath the switch there is a large thin nut that holds the hollow chrome nut to the dash. Remove the nut ( used a pair of pliers to turn it off) and the chrome hollow nut can be removed from the front of the dash board along with the Lights escutcheon.
Assembly is the reverse with the wires all attached as per your photo that you took.
Photos below are of my old dash light switch being taken apart which had a broken Lights escutcheon but a small ring of it is still there held in place by the hollow chrome nut.
[attachment=7]IMG_2390.jpg[/attachment][attachment=6]IMG_2391.jpg[/attachment][attachment=5]IMG_2392.jpg[/attachment][attachment=4]IMG_2393.jpg[/attachment][attachment=3]IMG_2395.jpg[/attachment][attachment=2]IMG_2396.jpg[/attachment][attachment=1]IMG_2397.jpg[/attachment][attachment=0]IMG_2398.jpg[/attachment]